Showing posts with label #punchitup. Show all posts

Thursday, 27 April 2023

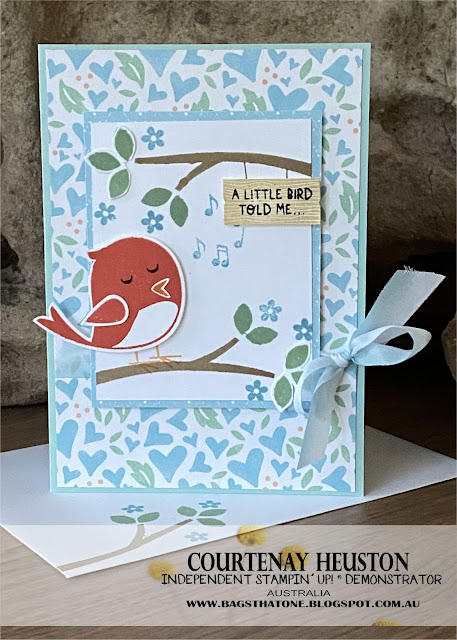
Stampin' Up! Sweet Songbird and Bird Builder Punch

A cute little card made using the Stampin' Up! Sweet Songbird and Bird Builder punch. Currently a Bundle saving you 10% until 2nd May then available separately. Shop for your stamp set and punch with a click of this photo!
Bird Card
Check out the video to see how this card has been made.

Remember you can get your paper craft supplies in Australia without even leaving home! Click HERE or on the picture below.


Last Chance banner clickable link


Download the PDF for the current Catalogues with a click of the images below.


Link to Annual Catalogue PDF


Courtenay 
Do you live in Australia and would you like to become a Demonstrator, save yourself at least 20% every time you shop, get great rewards and get to craft with Stampin' Up! products before their release? If you answered YES to any of those questions click here to join my team - for more information. 


Want to get the best bang for your buck as us Aussies like to say - then Join my Uni-Q Crafters team here: 𝐋𝐈𝐍𝐊 𝐓𝐎 𝐉𝐎𝐈𝐍 - for only $169 netting you* $235 worth of goodies (*note when there is a joining special this amount is subject to change)


Tuesday, 4 January 2022

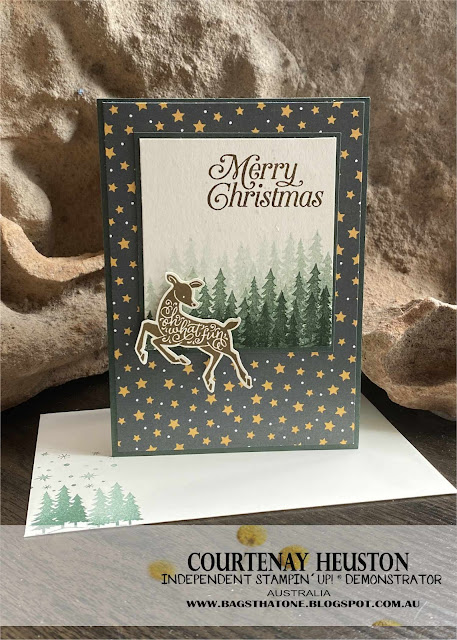
Hooray it's Thursday 16th Dec 21 - Peaceful Deer Stampin' Up! Bundle

 A Quick and easy card for Hooray it's Thursday 16th Dec 21 - made using the Peaceful Deer Stampin' Up! Stamp set and coordinating Deer Builder Punch.

Card front

Stampin' Up! Supplies: • PEACEFUL DEER PHOTOPOLYMER STAMP SET (156891) • DEER BUILDER PUNCH (156390) • Adhesive Dimensionals (104430) • Evening Evergreen Card for the base and the mat • Retired now - but use anything with small stars on it. • Very Vanilla Card for the Deer - stamped in Soft Suede • Very Vanilla Card for panel - trees stamped in Evening Evergreen • PERFECTLY PLAID PHOTOPOLYMER STAMP SET (158335) for the sentiment stamped in Soft Suede.


Until next time - remember you can get your paper craft supplies in Australia without even leaving home through my Stampin' Up! Store front by clicking on the picture below. 


Courtenay 
Do you live in Australia and would you like to become a Demonstrator, save yourself at least 20% every time you shop, get great rewards and get to craft with Stampin' Up! products before their release? If you answered YES to any of those questions click here to join my team - for more information. 


Saturday, 17 August 2019

Stampin' Up! Delightful Tag Topper Punch - SBTD August 2019 Blog Hop


Thanks for stopping past from Tricia's page - how cool were her teacher cards? 

This month we celebrate our 2nd Anniversary and to celebrate we are having a designers choice theme - so it's our pick! We can make what ever we want! So I decided to revisit one of my old favourites with  the Delightful tag topper punch to make a cute card and matching treat box.


Basic Supplies
· Card base – cut cardstock - 29.8 x 10.5 (A4 in 1/2 landscape)
· DSP front – cut 1 piece – 10.5 x 10.3cm 
· Whisper White inner – 13.5 x 10.3cm
· Circle for sentiment—whisper white
· Scallop Circle to mount on
· Ribbon for close


1. On both short ends of your base card measure 1 cm from the edge and make a dot—this is your placement spot for your punch edge.

2. Punch each of the short ends with the Delightful Tag Topper Punch. Just make sure that the card stock is centred before you punch. You will need to wiggle your card stock a little to feed it all the way to the back of the punch. The punch is designed to only take a 2" wide piece of card stock but with a little wiggle it fits.
3. Cut the little rectangles next to the delightful tag topper pieces away from the card stock. Score along one of the tag top ends
4. Fold card so that the circles of the Delightful tag topper overlap.,
5. Decorate as desired.
 Now for the cute little treat box.


Basic Box Supplies
· Box base – cut cardstock - 21 x 7.5cm
· Box sides – cut 2 pieces of cardstock – 10 x 5cm  (11.5 x 5 for taller top)
· Belly band – DSP or card – 21 x 4.5cm 

Instructions


1. Score at 5cm, 10cm, 15cm, 20cm. Turn & score at 2.5cm. 

2. Fold & flatten all score lines.
3. Cut at red lines for box bottom & cut away shaded area.
4. Adhere box sides using sticky strip on side tab.
5. Adhere box bottom using multipurpose glue or tear tape strips. 
6. Score both pieces at 5cm & 7.5 cm. See diagram.
7. Fold & flatten scores to form sides.
8. Punch short end of card with Tag Topper Punch.
9. Adhere 5cm end to front & back of box base.
10. Use twine, ribbon or clips to close top of box.
Decorate as desired.


Thanks for stopping in - now please hop on over to the hive and visit Tashana - she might just have a little sneak peek from the holiday catalogue happening. (wink, wink, nudge, nudge)


Courtenay

Do you live in Australia and would you like to become a Demonstrator, save yourself at least 20% every time you shop, get great rewards and get to craft with Stampin' Up! products before their release? If you answered YES to any of those questions click here to join my team - for more information.


Tuesday, 6 June 2017

Daisy Delight - a Bundle that is just Delightful!

The name of this bundle says it all - Daisy Delight - it belongs to the Delightful Daisy Suite. The Suite has coordinating Designer Series Paper, Card Stock, Faceted Gems, Double Stitched Ribbon in Daffodil Delight (even the colours sound like they fit right in), a Daisy punch and the beautiful Daisy Delight stamp set.

This Suite featured heavily at my launch last weekend and was very popular. Here are some of the items on display.


A bucket full of flowers just like the real ones. The little buckets can be purchased from Kmart in Australia - gold or black.


A close up of the flowers - the shape to the petals was from the bone folder. Oh and yes I am still engraving the Bone folders here in Australia you just need to pop me a message via my Facebook page HERE. Not on Facebook? I can be contaced through the 'Contact Me' button on my Stampin' Up! site.


My mum is one of my greatest cheer leaders and its not uncommon to be asked for a card for a friend - usually with a 'Oh I need to leave in 10 - can you do it?' So the bucket of loveabove went to our friend Joyce for her 80th birthday - I popped a 80 cake topper in there to add to the flowers. Below is the matching card with the sentiment from the 'Happy Birthday Gorgeous' stamp set.
Joyce and all the extended family mum was with loved it!


This card was one for my display with the sentiment from 'Just Add Text'.


So now about my Daisys - I am guessing you would like to know how I made them.
I purchased florists wire 28 and 18 gauge (because that's all they had) a small bucket and some fake greenery to pop in it, the other thing that's important is a ring of foam - I painted mine black to match the bucket.
 
Using the Daisy Delight Bundle and a few extra goodies the flower bucket is not difficult.


I punched 2 Whisper White flowers, a 1" circle that then has a small 1/16" hole punched in it, a Elegant Eggplant spot that's stamped (using the Daisy Delight Stamp set Daisy center) tone on tone then punched using the 1/2" circle. A piece of wire and a small pair of long nose pliers. I used Multi Purpose Glue and Glue dots.
Using the dauber I coloured the centers of the White flowers just a little.


The wire gets bent twice first to form a small hook then a second to lay that hook flat over the 1" circle.


If you look closely you can see where the Glue dots have landed. If you prefer you can use Multi Purpose Glue for added strength - I do on the 1" circle, the glue dots hold long enough for the glue to dry and between the 2 adhesives they haven't failed me yet.


So add the 3 layers of flower together - now you can add a little colour to the petal tips and shape your petals with your bone folder. You will note mine are not perfect or symmetrical.
 

I found turning the flower upside down on the work surface makes it easier to attach the 1" circle to the flower back.

The wire and foam makes positioning the flowers in the arrangement easy.
This photo below is where my inspiration comes from - I took a photo of some real Daisy's in my Physios garden  one day that were just so pretty.
 
 
So I couldn't help myself it was Daisy's everywhere - here is a coloured bucket. These ones were all stamped with the daisy stamp before punching them out as well. The centers in these ones have a dimensional under them - I am loving the small dimensionals for this small pop. The Pumpkin Pie flowers actually have 3 layers for a fuller flower.


To make the 3D Inspired Daisy's you will need these goodies - the Elegant Eggplant Cardstock you only need a scrap of though! In Australia you can click the pictures to be taken to the online store.
I hope you like my flowers - Till next time -
 
Courtenay
Do you live in Australia and would you like to become a Demonstrator, earn discounts, great rewards and get to craft with Stampin' Up! products before their release? If so click here to join my team - more information here.